
A decor reveal is exciting.
You have planned the room, chosen the pieces, moved furniture, styled shelves, adjusted the lighting, and finally reached the moment when the space feels ready to share.
Then you open your camera and notice things you did not see before.
A cord is dangling. The rug is askew. There are fingerprints on the mirror. The throw blanket is all over the place. The coffee table is overflowing. The shelf has some dust on it. There’s a jumble of shoes in the corner.
Photos notice everything.
Does that mean your home has to be picture-perfect? That means you need a process that will help you get your room to look put-together in advance of your photoshoot.
Start With a Clean Base
Before styling or taking photos, clean the room well.
A camera can make small messes stand out. Dust on a table, crumbs on the floor, streaks on a mirror, or pet hair on a sofa can draw attention away from the decor you want to show.
If the room needs a deeper clean than you have time for, it may help to read Every Girl’s Homeaglow feedback before deciding whether outside cleaning support makes sense. Professional help can be useful when you want your home to look fresh for a reveal but do not want to spend all your energy cleaning before you even start styling.
Once the room is clean, the decor has a better chance to stand out.
A clean base also helps you see what still needs adjusting.
Clear the Room Before You Style
Start by decluttering everything that does not need to be in the photo.
This includes mail, toys, dishes, laundry, cords, bags, shoes, pet items, cleaning supplies, and other unnecessary decorations that have accumulated over time.
You may want to organize some things into baskets if you need some extra help.
Place what belongs in the next room in one basket and what you need to organize later in another one.
Do NOT try to organize the whole space before taking the pictures.
Remember to think about what you want to see in the image.
A tidy room helps draw the eye to the items in the main photo, such as the furniture, colors, textures, and other decorations.
Look Through the Camera First
Before you style everything for the shot, snap a few test photos.
Your camera will show you things that your eye might miss.
Examine the image. Is your favorite rug centered? Are your decorative pillows lying on the floor? Is your lamp swaying? Are there cords in the way? Is the background distracting?
A test shot helps you focus your work.
You don’t have to style the entire room if you can see what the camera saw.
This is important to consider when you’re taking photos for a blog, social media, a listing, a portfolio, or just your own personal records.
Something might look nice in person, but it needs tweaking for the camera’s view.
Dust Every Visible Surface
Dust bunnies tend to show up in photographs, especially on shelves and table tops, frames and dark furniture.
Do a little pre-photo dusting from top to bottom.
Fans, fixtures, shelves, frames, lamps, tables, mantels, baseboards, and electronics need to be dusted.
Don’t forget decorative accessories.
Vases, books, trays, candles, bowls, plants, and picture frames can collect dust.
Clear shelves of their contents and dust the shelf itself before replacing items with cleaned ones if you’re photographing them.
It’s a small task with big results.
The freshly cleaned surface will reflect light to make the room look brighter and more organized.
Clean Mirrors and Glass
Mirrors and glass can really liven up a room, but they also show every smudge.
Spotless mirrors, windows, glass tables, cabinet doors, frames, and display cases.
Viewed from different angles so that you can see any stray streaks.
Because sometimes only when viewed from a different angle do you notice those pesky streaks.
If the room you are staging contains a mirror, be sure to check and make sure that it is not reflecting unwanted objects such as trash cans, laundry rooms, etc.
While a mirror in a room can be very nice and add a nice touch to a photograph, it will also reflect the true state of the room, so use mirrors to reflect light and nice portions of the room.
Pay Attention to Floors
Floors tend to dominate the composition in photos more than you might expect.
A lopsided rug, a floor littered with crumbs, or a visible trail of dust, can distract from the decor.
Vacuum area rugs, and sweep or mop bare boards, depending on the surface.
Look out for the backs of furniture and along legs, as well as in corners.
If the rug is to be seen, make sure it is straight.
Lead legs should be placed at the same front if it is part of the composition.
Remove small objects such as toys, cords, pet hair, tags, and lint.
Clean floors give a finished look to a room.
Style the Main Surface
Most rooms have one surface that commands the eye. It may be the coffee table, mantel or media console in the living room. It could be your bed or nightstand in the bedroom. Maybe it’s the table in the dining room or the kitchen island in the kitchen.
Pick one surface to style for your shot.
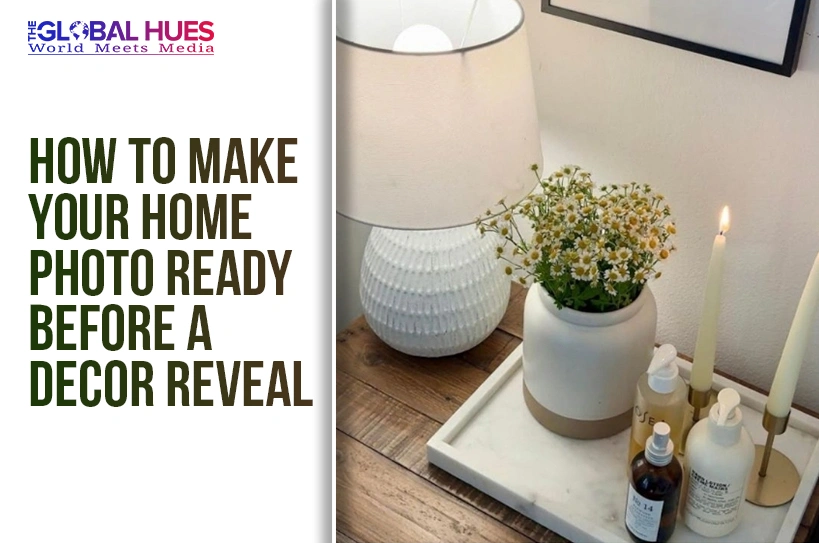
Clear off the surface, clean and prep the space, then start adding objects to it until you’re happy with how it looks. Use a tray, books, candles, vases, plants or bowls to add interest to the space. Just leave some room so the surface doesn’t appear cluttered.
I find that pictures tend to look better when the styling is a little less intense than what we’re used to in everyday life.
Let the objects on the surface speak for themselves.
Edit the Shelves
Shelves can sometimes be a problem when it comes to photography.
Too many little items on them can clutter the picture, but having none at all can make the shelf look bare.
First, clear off any items that are unnecessary, too small, or that just don’t belong.
Next, organize the remaining items into groupings of similar objects based off of size, color, texture, etc.
You can use books, baskets, frames, simple trinkets, and plants as ways to decorate your shelves.
Make sure to leave enough space in between each item so that nothing looks cramped.
Once you have finished arranging your things, take a step back and snap a picture.
If your eyes aren’t automatically drawn to one item on the shelf, take it off and try again.
A well-prepared shelf will almost always turn out better than an ordinary shelf.
Make the Sofa Look Fresh
If your reveal includes a sofa or chairs, take a moment to address them
Vacuum the seat, picking up any crumbs or pet hair. Smooth out cushions and plump up pillows. Tuck the throw blanket neatly over the back or give it a little style by laying it on the floor. Check that the pillows are upright and not falling flat, or turned backwards.
If you have a sofa with removable covers smooth out any wrinkles and give them a gentle tuck,
Leather or other smooth surfaces need fingerprints and dust removed.
Your sofa is often one of the largest items in the room, so it makes a huge statement in the image, as does any chair.
It’s always a good idea to make it look its best. By taking the time to stage it, you make the whole room look better.
Make the Bed the Star
For bedroom reveals, the bed tends to be the focal point.
Make sure you present the bed well.
Smooth out the bedding and comforter, fluff the pillows, and fold the blanket or comforter neatly. If you have a bed skirt, make sure it is smooth as well.
Avoid wrinkles
If your bedding looks too simple, add a throw or pillows with texture. Nightstands should also be simple; a lamp, book, small plant or glass of water are good examples. Avoid placing too many objects on them as it may appear cluttered.
Finally, make sure the space around the bed is tidy. Clutter such as shoes, cords, laundry, and bins can often get caught in a picture.
A well-made bed is the centerpiece of any bedroom reveal.
Hide Cords and Visual Clutter
Cords can sometimes ruin a great photo.
So watch out for your phone charger, lamp cords, television cords, computer cords, or any other cords that may be plugged in.
Tuck them behind furniture or use clips or baskets to hide them if you can.
You should also look out for other unnecessary items in the shot.
These could include things like tissue boxes, remotes, bottles of products, extra toys, stacks of mail, or trash cans.
Other things are fine as long as they aren’t other unnecessary things that take away from what you’re trying to show off.
Get rid of anything that doesn’t help show the room’s personality.
You can always remember where you put things afterwards, or just put them back in their original spot after.
Check the Lighting
Lighting can make or break a decor reveal.
Natural light tends to be the easiest to work with, so consider opening up some curtains/blinds and taking photos when the room gets nice and bright.
Preferably, avoid harsh shadows when possible.
Turn off overhead lights if they end up being distracting or causing weird color shifts in the room, but consider using lamps if they add a nice warm feeling to the space.
Make sure to clean lamp shades and bulbs before taking any pictures.
If a room is particularly dark, consider opening up another door or moving some furniture around to let in more light, or use a mirror to reflect some light into the room.
Take test shots in different lighting conditions if possible.
The right lighting can make colors, textures, and detail stand out in a room.
Watch the Background
A photo is not only about the subject.
What’s in the background is important too.
Before snapping photos, make sure you look at whatever is in the background.
Avoid shooting a photo facing an open area.
Make sure any doorways, hallways, or open closets, counters, and corners are clean and tidy.
Close any doors that need to be closed and put away any clutter that’s in your way.
If a room leads into another space, make sure that the other space is clean to an acceptable standard too.
You don’t have to clean your entire house, just control what the camera will see.
A tidy background makes a world of difference in how professional a reveal feels.
Straighten Everything
Small, crooked details tend to stand out in photos.
When composing your shots, make sure things are straight; like, literally straight. Not just “I think it looks good”, but really straight. This means straightening your art, your mirrors, your lamps, your rugs, your pillows, your chairs, your curtains, your books, and your trays, among other things.
Check that your chairs are all pushed in the same way. Make sure that the stuff on your tables is either centered or placed thoughtfully.
Check your verticals.
Doorways, shelves, mirrors, and cabinets can throw off your shot if they aren’t perfectly perpendicular to the floor (or whatever surface you’re taking the picture on). Take a test shot and experiment. Straight lines will make your room look neater and nicer in your pictures. It only takes a few minutes, so it’s worth it!
Add Life With Natural Details
A room needs some life in it to feel welcoming.
Use fresh flowers, greenery, fruit, or branches to liven up the space.
Don’t feel that you need a massive arrangement, a small vase of flowers on the table or a plant by the window will suffice.
You can also use other natural elements such as fruit and greenery to brighten up the space and create depth without overwheliming the room.
It also creates a warm and less clinical look for photos.
Select what looks good in the different rooms in your home.
A bowl of lemons looks good in the kitchen, a small plant looks nice on a shelf, but fresh flowers really make the house come to life, especially in the bedroom and dining room.
Keep It Real but Polished
A photo-ready house does not necessarily mean that it has an artificial look.
It is possible to leave a book on the chair, a cup on the tray, and a throw blanket on the sofa.
It is about the intentionality of the objects.
For example, one can place a book in a room to create a homely atmosphere. But the same book in an unorganized pile of paper can make the room look untidy. Similarly, the same folded throw blanket can make the room look cozy. Whereas the same throw blanket lying loosely on the sofa makes the room look unkempt.
A photo-ready house should look like a lived-in space.
It should be neat but still have some chaos similar to how people usually leave their houses.
The photo-ready house should be beautiful but still have the comfort of being at home.
Take Photos From More Than One Angle
Don’t shoot one picture.
Try different angles.
Take a shot of the whole room in case you have to use it, then get closer to take pictures of your shelves, your pillows, your lighting, your art, your table, etc. Take a picture from the doorway.
Go around and take pictures while you do and only stop when you think you have the best shot.
Sometimes the best shot isn’t the first shot.
Take pictures while looking around the room and at things in the room
If you think something looks weird, then you can change it and take the picture again.
It won’t make that much of a difference if you change a few little things.
Do a Final Walk Through
Before you wrap up, do another walkthrough.
Check all the surfaces, the floors, the mirrors, the pillows, the rugs, the shelves, the cords, and the background.
Search for distracting elements.
Take another test shot.
A final walk through will help you see if something as small as a tilted picture frame is affecting your shots.
Something as simple as a wrinkle in your throw blanket can be caught here, along with something as subtle as a lone cup on a shelf. Take your final pictures, and then bask in the glory of a job well done.
A Photo Ready Home Starts With Simple Details
Making your home photo ready for a decor reveal doesn’t mean you have to be perfect. It means taking care of the little details the camera will see.
Do not forget to clean the place. Tidy all surfaces. Remove all clutter, dust, and cords. Set the furniture right. Make sure your mirrors, rugs, and floors are spotless. Set the stage with some nice lighting.
Most importantly, leave the decor room to breathe.
If you want your space to be captured in a picture-perfect way, then you need to make it presentable. You need to make it look like a real home.
This is a decor reveal, after all.
(DISCLAIMER: The information in this article does not necessarily reflect the views of The Global Hues. We make no representation or warranty of any kind, express or implied, regarding the accuracy, adequacy, validity, reliability, availability or completeness of any information in this article.)
Related Article:
- Your Custom Home – Careful Considerations
- Innovative Interior Design Trends To Refresh Your Home
- How to Choose Living Room Furniture That Stands Up to Active Lifestyles